Tuesday, August 30, 2011

Baked Salmon with Cilantro Sauce

A couple of days ago, I received a special request for a cilantro sauce. I saw this dish a couple of months ago in a local restaurant called Koto's. The establishment has good food but I have been noticing complaints from some people about their service and a couple of incidents where people see bugs. A very delicate matter, I'd say. My family likes to go there for their Cilantro salmon, but recently had to deal with rudeness from their staff. I guess sometimes people get the high air that because their restaurant has been established there and our sister city for so long, customer service doesn't matter. Regardless our client base, in this culinary industry, they still pay our bills. Here is the recipe requested.


Baked Salmon with Cilantro Sauce


Ingredients:
1 tbsp butter
2 minced garlic cloves
1 1/2 cups chicken broth
1/2 cup chopped green onions
2 cups fresh cilantro with stems removed
1/4 tsp salt
5 tbsp sour cream or even table cream
4 tbsp olive oil
6 salmon filets
salt and pepper to taste for filets


Directions:
First melt the tbsp of butter in a saute pan. Add the green onions and garlic and saute for 4 minutes. Reduce the heat and add the chicken broth and boil for 10 minutes. Remove from heat and transfer to a blender or food processor and add the 2 cups of fresh cilantro and the 1/4 tsp of salt and blend. Then add the sour cream and pulse until mixed.
Preheat oven to 400f.Then make paper foil pockets or packages to sit the salmon filets in. Add the olive oil to the pouches and then season the salmon filets with salt and pepper to taste and secure inside these pouches. Bake for 15-20 minutes until salmon is flaky and easily shreds with a fork. Serve on plate and dress with Cilantro Sauce. Enjoy! <3


Tuesday, August 23, 2011

Seared Chicken breasts with Creamy Brie sauce, white rice and black beans and Kale and Collard greens with green beans


The other day I was going through my online recipe book wondering what dish I should make my mother in law. I love mom very much. She is our rock in every sense of the word. Every time I have shared time with her and my second family, Brie always makes its way to the table. I think I fell for brie when I met my significant other. The taste and creaminess soothes my palate. I ran into the perfect entrée, consisting of seared chicken breasts with a creamy hot brie sauce. I decided to pair it up with some green beans and collard and kale greens and white rice with black beans. This of course was my choice. If you find something you would love to pair these chicken breasts and brie with go right ahead. On another note, boneless chicken breast can be used but do not sear them as much as mine because I love bone in and boneless would just over dry if seared to much.
Ingredients:
6 Chicken breasts with bone in
4 tbsps chopped garlic
½ cup chopped green onions
½ cup Olive oil
1 tsp salt
1 tsp pepper
1 cup white rice
4 cups chicken stock
Bunch of kale greens
Bunch of collard green beans
Fresh grean beans ends trimmed
1 pkg salted pork
1 can black beans or two cups if you cook your own
1 lrg brie wheel
2 cans table cream (Found in the baking aisle next to sugar and evaporated cream. We need table non sugared though)
½ stick butter

Yes I know…..this already sounds like one of those meals you leave your calorie counter hidden somewhere. This should count for 2 cheat days then…lol.
Directions:
In a medium sauce pan start boiling 1 cup water and 2 cups of chicken stock with the ½ stick of butter. When it starts boiling add the 1 cup of white rice and can of black beans and lower the heat 2 notches and cook for 17 minutes. 
With the rice out of the way, start by washing your greens very well.


They normally come with a little dirt since they grown on the ground and are not really washed thoroughly when placed on our produce aisles. You chop into long strips and start with a heated sauté pan. Add ¼ cup olive oil and ½ tsp sea salt and ½ tsp pepper. Let it heat up and then add 1/4 cup chopped salted pork and 2 tbsp chopped garlic. Sauté it for a good ten minutes and medium heat. On another sauté pan, add the rest of the olive oil and the rest of the chopped garlic.


Heat it up really well on high and add the chicken breast with chicken down and bone up. Press down with with a lid or grill press. Add the rest of the salt and pepper left on the chicken breasts and sear them really well on each side for 10 minutes on each side. Have your oven on 450 waiting. On a baking sheet, add baking spray or spread a little butter to add your seared chicken breasts to. Place in oven for 30  minutes covered with paper foil. Going back to your greens, add the chopped greens to your salted pork and sautéed oil and garlic. Saute then lower the heat. Let it simmer with 1 cup of chicken stock. While that is boiling, cut your green beans. Add them and stir then cover for five minutes and then un cover and turn off the heat. Your green beans should be slightly crunchy. The only thing you should have cooking by now are your chicken breasts in the oven. 


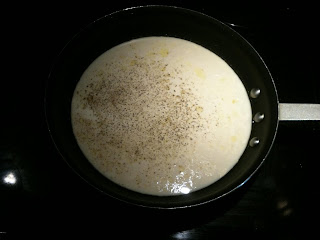
On a medium saucepan, add 1 cup chicken stock left and 2 cans of table cream with a pinch of salt and pepper. Let it heat up for a bit. You can wait and place the heat up when your chicken breasts are almost done so your sauce will be ready to serve with your food altogether. When you heat it up, add the brie wheel and stir like a mad crazy woman. Do this until your brie is completely melted and your hand hurts. Just kidding. When you start serving add a sprinkle atop the brie sauce which should be served atop the chicken breasts. Enjoy! <3


Saturday, August 20, 2011

Lavender & Honey butter

A couple of years ago, my job sent me to Seattle for a week. While there we dined at the Space Needle restaurant and had the most amazing bread and butter. The butter was unlike anything I'd ever tasted. It was sweet but savory. There were hints of lavender and honey, or so I thought. After doing some research I found out that the butter was actually made with real maple syrup and lavender. It may have had other ingredients, but who knows. I figured I would try to replicate something similar and see how well it would turn out. Luckily, the butter tasted great and everyone loved it! Here is the recipe:

Ingredients

1
cup
softened unsalted butter
1
tablespoon
dried lavender
1
tablespoon
honey
Salt

Directions

1 Mix ingredients thoroughly and let sit for a while so the flavors combine

2 Do not refrigerate because you want the butter to be soft and spreadable on bread.

3 Enjoy with your favorite bread or toast :-)

You could probably use fresh lavender and dry it and crush it into tiny pieces but dried lavender works fine. I think it will be easier to find dried lavender in stores. I found this lavender at an Indian Spice store:


You could probably also substitute the honey with maple syrup. Maple will probably be sweeter than honey and have a more richer taste.

If you want to freeze the butter you can. You can shape softened butter into logs and wrap with waxed paper or plastic wrap. It will stay good for a long time. There are endless possibilities for what you can do with the butter. You could probably use it to cook as well. Be creative and come up with your own ideas and share them! :-)

Friday, August 19, 2011

New Recipes!


So yes, like I said previously, I have been pretty busy lately. As you all can see though I have made some time today to add additional recipes to the blog. Always remember if you have any questions comment on the recipe page comment boxes our even on Lacucinadelagordita facebook fan page.......And for any catering questions, Gorditascatering@gmail.com works very well as well. Now just as a refresher......recipes I add will be under their topic tab. I sometimes do post them in the home page, especially if their asked for or a highlight. Also keep your eyes out. I heard Tony Veloz has a recipe coming up soon as well. Again thanks for the support and Enjoy! <3

Thursday, August 18, 2011

Kitchen terms: Saute and Sate

These two words when used or seen on recipes can be quite confusing. Many folks think they mean the same thing. This is where the recipe goes awry. Saute actually means to cook something quickly in a small amount of oil. Sauteing some stir fry veggies for example. I love sauteing my noodles in some peanut oil for my fave Thai dish. Now Sate is actually referring to an Indonesian snack food per se. It consists of small marinated pieces of meat or poultry threaded on skewers broiled or grilled. Most likely served with a peanut sauce. After this clarification, these two words have nothing in common as we can see.

Saute/ Sauteed/ Sauteing


Sate


Receta semenal en espanol: Chiles en Nogada

 Esta receta le e cuidado mucho, pero de que sirve cuidarla si no se disfruta haci? Obviamente espero que muchos sepan la historia atras de esta receta famosa. Esta recte origina de Puebla, en donde tres mujeres trataban en hacer llamar la atencion de un soldado con sus llamativas colores en esta receta. Chiles poblanos para lo verde de la bandera mexicana, la salsa de los nueces de castilla para lo blanco de la bandera y las semillas de granada para lo rojo de la bandera. Una receta simplemente deliciosa. Cualquier pregunta porfavor preguntar. <3


4 porciones
  • 1/4 tz aceite canola
  • 1/4 tz cebolla blanca
  • 1/2 lb pierna de cerdo, finamente picada
  • 1/2 lb sirloin, finamente picado
  • 1 lb jitomates guaje, picados
  • manzana Golden Delicious, pelada, cortada en cuadritos pequeños
  • pera D'Anjou, verde, pelada, cortada en cuadritos pequeños
  • 1/2 plátano macho maduro, pelado, cortado en cuadritos pequeños
  • 1/4tz almendras, peladas, picadas
  • 1/4 tz pasitas negras, picadas
  • 1/4 tz piña dulce, cortada en cuadritos pequeños
  • 1/4 cdta canela mexicana molida
  • Clavos de olor, una pizca
  • Sal, al gusto
  • 1 tz nueces de Castilla
  • 2 oz almendras, peladas
  • 1/2 tz crema mexicana
  • 4 oz queso de cabra fresco o queso fresco mexicano
  • 3 oz queso crema, a temperatura ambiente
  • leche, la necesaria
  • sal, al gusto
  • pimienta blanca molida, al gusto
  • azúcar, al gusto
  • 1 cdta jerez dulce (opcional)
  • 8 chiles poblanos con una pequeña abertura de 2 cm en la punta y fritos hasta que les salgan ampollas, se enfrían, se pelan y con cuidado se les retiran las semillas.
Adorno
  • 1/3 tz semillas de Granada
  • 1/4 perejil, finamente picado
Procedimiento
  1. Caliente el aceite en una cacerola y fría la cebolla hasta que esté suave. No la dore.
  2. Añada las carnes picadas y fríalas bien. Añada los jitomates y cocínelos hasta que la carne esté tierna y completamente cocinada, unos quince minutes.
  3. Reduzca el fuego y añada la manzana, la pera y el plátano macho. Cocine por cinco minutes a fuego suave
  4. Añada las  almendras, las pasitas, la piña, la canela, los clavos, y sal a gusto. Continúe cocinando, mueva ocasionalmente hasta que se evapore el líquido. Retire del fuego y enfríe la mezcla a temperatura ambiente.
  5. Incorpore las nueces, almendras, crema, queso de cabra y queso crema, agregue leche si es necesario, la mezcla debe ser espesa y con fuerte sabor a nuez. Sazone con sal, pimienta y azúcar a gusto (añada el jerez). Cubra y enfríe.
  6. Rellene los chiles con la carne. Los chiles deben estar completamente llenos. Cubra los chiles con la nogada y adorne con las semillas de las granadas y el perejil picado.
  7. Nota : Si no tiene tiempo para pelar las nueces de Castilla, use mitad de nuez de Castilla y mitad de almendras peladas. Disfruten!

Tuesday, August 16, 2011

Long Hiatus

I know it's been 4 days since I've posted anything. I have an event coming up for The Shop for Cause within Macy's which most of you know is my employer. I was asked to participate in helping lure clients in purchasing exclusive coupons for the day from Non Profit charities like the Salvation Army. They will be selling those coupons for $5.00 which will be applied 100% to their organization. I will lure the clients with my appetizers of course. I am doing this without any profit in exchange. Only profit received will be exposure and that is more than enough. So yes I know owe a spanish recipe and a kitchen term blog. I will be working on that tonight. If anyone wants to partake in this upcoming event by donations or time itself, let me know. The event will be held August 27th. Thanks for understanding.


Tuesday, August 9, 2011

My famous baked brie

Someone asked me why I chose this career over Fashion designing like I wanted to begin with.....Because someone wise once told me that if I saw myself old and still working within these choice, weather professionally or the comfort of your home, It all meant I was happy to do it. Work doesn't always have to be something we need to do compared to what we desire to do. This is my choice. With this in mind I'll share my most worthy recipe that makes me melt regardless the day I've had. Baked Brie. Enjoy! <3


Baked Brie


Ingredients

  • Honey
  • A medium Brie
  • A thawed pastry puff
  • Egg wash from 1 egg
  • Pecans, walnuts or any other nut of your choice.
  • Fruits of your choice. Blueberries, cranberries, apples, etc;
  • Brown sugar
Directions

1 Preheat oven to 350 degrees F.
2 On a stick-free cookie sheet, lay out the puff pastry or the crescent rolls flat; put brie round or wedge on top.
2 Spread honey, pecans or other nuts and fruit of your choice. Fold dough over top brushing egg wash on top edges and cutting off excess dough. Drizzle more honey and place a handful of brown sugar on top.
3 Bake at 350º for 25-30 minutes, pastry should be golden brown. Let cool for 10 minutes before serving.

These brie is extraordinary. Be creative and add raspberries, jams or even mint and pesto for a dinner side. <3 Cheers to passion!

Saturday, August 6, 2011

Croxetti & Shrimp

First of all, I'm very happy and honored to have been asked by my cousin to contribute to her blog. She is doing such an amazing job of keeping it updated with great recipes and information. Since I'm into photography, I wanted to start doing more food photography, and this just seemed like an excellent opportunity not only to share recipes but also other information that I find interesting. For my first recipe, I will be presenting a dish called croxetti & shrimp. You may be asking yourself what croxetti is. Croxetti is a flat coin-shaped pasta that is stamped by hand with cool and interesting patterns. Below is a photo. Please click on it to enlarge.


I came across croxetti while in an Italian food market in NYC, and I thought it was interesting. I wanted to share a recipe that was not only tasty but one that was easy enough to allow you to switch the ingredients if you so wished. I found very few recipes for croxetti online, so I came up with my own original recipe and decided to throw in some ingredients that I thought would taste good together. Here is what I came up with:

Ingredients
2/3 lb bag of croxetti pasta (if you cannot find an Italian market, you can buy it online either here or here )
1/4 lb porcini mushrooms
1 jalapeno, diced
3 garlic cloves, minced
2 tbsp fresh oregano
8 oz gulf shrimp
freshly shaved parmigiano-reggiano cheese or trentingrana
extra virgin olive oil for cooking

Directions
Mince the garlic and the jalapeno pepper while the pasta cooks (about 10 minutes). Heat several tablespoons of extra virgin olive oil in a wok, or deep nonstick pan and sauté the garlic and jalapeno pepper until the garlic begins to brown. Wash the mushrooms, and cut them into thin (~1 cm) strips. Add them to the hot oil and cook, while stirring occasionally for 10 minutes. Add the shrimp and oregano. When the shrimp turns pink in color, toss with the drained pasta and serve hot with a sprinkle of shaved parmesan cheese. Here is the end result:


Be sure that if the pasta is ready before the rest of the ingredients to leave it in the water while the rest of the ingredients finish cooking. I made the mistake of draining the water a little too early and the pasta disks started to stick together. You could probably even add a little extra olive oil right after combining all the ingredients if you feel it is too dry.

To add heat to the dish, I decided that the chopped jalapeno would be perfect. The Mexican in me wanted some spiciness! :-) However, you can also use other peppers, like habanero or poblano. You can also substitute the croxetti of course if you cannot find it, with another pasta. Linguini or Fettucini may be some good options.

I really hope you guys try this recipe and enjoy it. I will be back soon with more recipes and blog posts. And, more pictures! Hasta la proxima! :-)

~ Tony V.


Friday, August 5, 2011

Receta semenal en Espanol: Rollos de carne rellenos de espinacas y quesos


Ingredientes

  • 1 falda de carne grande
  • Sal y pimienta
  • 6 onzas de queso Asiago dezmenuzado
  • 8 onzas de espinacas
  • 6 onzas de gorgonzola, dezmenuzado
  • 4 cebollitas verdes cortadas
  • 8 a 10 palillos de madera remojados

Direcciones

Prende un sarten de guisado a fuego alto.


Empieza por cortar la falda de carne an rebanadas sufficientemente grandes para rellenar pero al mismo tiemp doblar o enrollar en nuestros palillos de madera. Empieza a sazonar la carne con sal y pimienta. Luego rellena primero con queso asiago, espinacas, queso gorgonzola y por fin las cebollitas verdes. Empieza a en rollar lo mas apretado que puedas y coloca los entre los palillos. Cocina por cada lado por 4 minutos enn cada lado o al gusto de termino. Yo prepare este platillo con unos trozos de chorizo andouille y un arroz blanco. Disfruta!

Kitchen Terms: Blanching

  I always thinking about what I can add to my blog that might be helpful. Terms came to mind the other day because my girlfriend asked me what blanching meant and what was it for. I realized that there are a lot of terms out there that most of us do not understand and can take advantage of while in the kitchen to make things easier. So this week I will start with the meaning of blanching and I will provide a recipe with it. I will try to do this once a week and provide a recipe with the term we will use.

Blanching:


Blanching is a process, where whichever fruit or vegetable, is plunged into boiling water and then removed and finally plunged into icy water( shocked ), to halt the cooking process. This normally works wonders when using asparagus or green beans in dishes. If we sometimes continue cooking or leave these items in boiling water they become soggy. For my Spicy Collard Greens recipe I love my green beans blanched at times. The crispiness with my wilting collard greens makes a great contrast. Nuts and pistachios blanched are always a great idea to help remove the outer skin. The recipe I will use is that of a Pomodoro salad. I love blanching the tomatoes because this gives the salad the needed fresh tomato juice but no messiness with the peeling or any sogginess. 

Pomodoro Salad


  • 3 large tomatoes
  • 1/4 cup olive oil
  • 1 -2 garlic clove, crushed
  • 1/8 teaspoon dried basil
  • 1/8 teaspoon oregano or 1/4 teaspoon italian seasoning 
  • 1/4 cup thinly sliced red onions 
  • salt and pepper

Directions:

     Blanching: Boil some water and in a big bowl add cold icy water. Add the tomatoes to the boiling water then remove and add immediately to the icy cold water. You will automatically see the skin of the tomatoes wrinkle up and semi peel. Peel the skins and cut into slices or cubes. This will add some juice to the pomodoro salad but will not create a soggy mess since the tomatoes will remain almost entirely intact.


  1. In a bowl put oil, onion and seasonings.
  2. Add tomatoes, either sliced or in small chunks.
  3. Use salt and pepper to taste, and mix well.
  4. Let marinate at room temperature at least an hour, for a few hours in the refrigerator.
  5. Italian or French bread or crusty rolls are a must to accompany this delicious yet simple salad.
    Enjoy!

Wednesday, August 3, 2011

Announcing collaboration with Tony Veloz

Fellow foodies,

      I am so excited to announce my new collaboration in my food blog with my talented cousin Tony Veloz! As many of my friends and family know, my cousin is a very talented photographer, within many other talents, stationed out of Washington, D.C. He is very much always been my inspiration and is very dedicated in his work and talents. He shares such an interest in anything culinary and has taken an interest in food photography. He will be posting a weekly( or as he wishes) recipe feature in the near future and would like to mention that a lot of our cooking photos besides taken by me or my girlfriend will be also taken by Tony. You will all truly see the difference. Any one interested in his fashion photography can also visit his portfolio site. Like I said previously I am very excited for this new merge and very proud to be related to him. Again thank you very much cousin! <3


www.tonyveloz.com

Monday, August 1, 2011

Anyone know the recipe for more time?

 I have been looking frantically and fanatically for the recipe for more time. I love blogging. Don't get me wrong.....time is what seems to slip my fingers. I still have my older sister's voice in the back of my head asking for delicious meals that can be done with little time because obviously I am not the only person affected by this time issue. Even though I do sometimes think it only affects me....silly me. Well for now I have a sure hitter to offer. I will keep them coming during the week I promise. And on a small note, ladies and gentlemen feel free to ask and and comment back any concerns or questions. I'm all ears.....Love sharing tips about anything culinary.


 Chicken with Poblano Cream Sauce


  Ingredients
1 poblano chile
2 tablespoons canola oil
1/2 small onion, chopped
1 clove garlic, minced
1/3 cup heavy cream ( For those who don't know it says Heavy whipping cream and normally comes in a small pint carton by our milk section. Only reason I am saying is because one specific time my younger brother called me and said he did not know why my Fettucine Alfredo recipe call for sweet whipped cream.....adorable fool.)
salt and ground pepper
4 boneless, skinless chicken breasts

  Cooking Directions
  Remove seeds and ribs from poblano pepper and chop coarsely.
Heat 1 tablespoon canola oil in a small saucepan over medium heat; add onion and garlic; cook until soft, 5 to 7 minutes. Add chile and cream.
Puree in blender; add water if too thick. Season with salt and pepper.
Season chicken breasts with salt and pepper. Heat remaining tablespoon canola oil in a large skillet over medium-high heat. Cook chicken until golden and juices run clear, 4 to 5 minutes per side. Serve with sauce.
4 servings  Enjoy! <3